

Step 1
Download Zebra Setup Utilities
for Microsoft Windows:


Connecting....
Step 2
Run the executable file.
NOTE: If your computer prompts you for
permission to run the file, click the
appropriate button to allow it to run.
Step 3
Follow the prompts
in the installation wizard.
Note: if you have previously
installed Zebra Setup Utilities,
select the "Repair Application"
option to install the newer version.
Step 4
Connect the printer to your computer
using a USB cord (not provided).
CAUTION: Make sure to plug
the cord into the USB port,
not the Ethernet port.
Do not use an external USB hub
or USB cable extension.
Step 5
Plug the appropriate electrical
cord into your printer and
into an electrical outlet.
Step 6
Press the power switch
or the power button (|)
to turn on the printer.
As the printer boots up,
your computer completes
the driver installation and
recognizes your printer.
Step 7
From the Zebra Setup Utilities installed
printer screen:
Select (highlight) your printer
Click Configure Printer Connectivity
Step 8
In the Connectivity Setup Wizard:
Select Wireless
Click Next
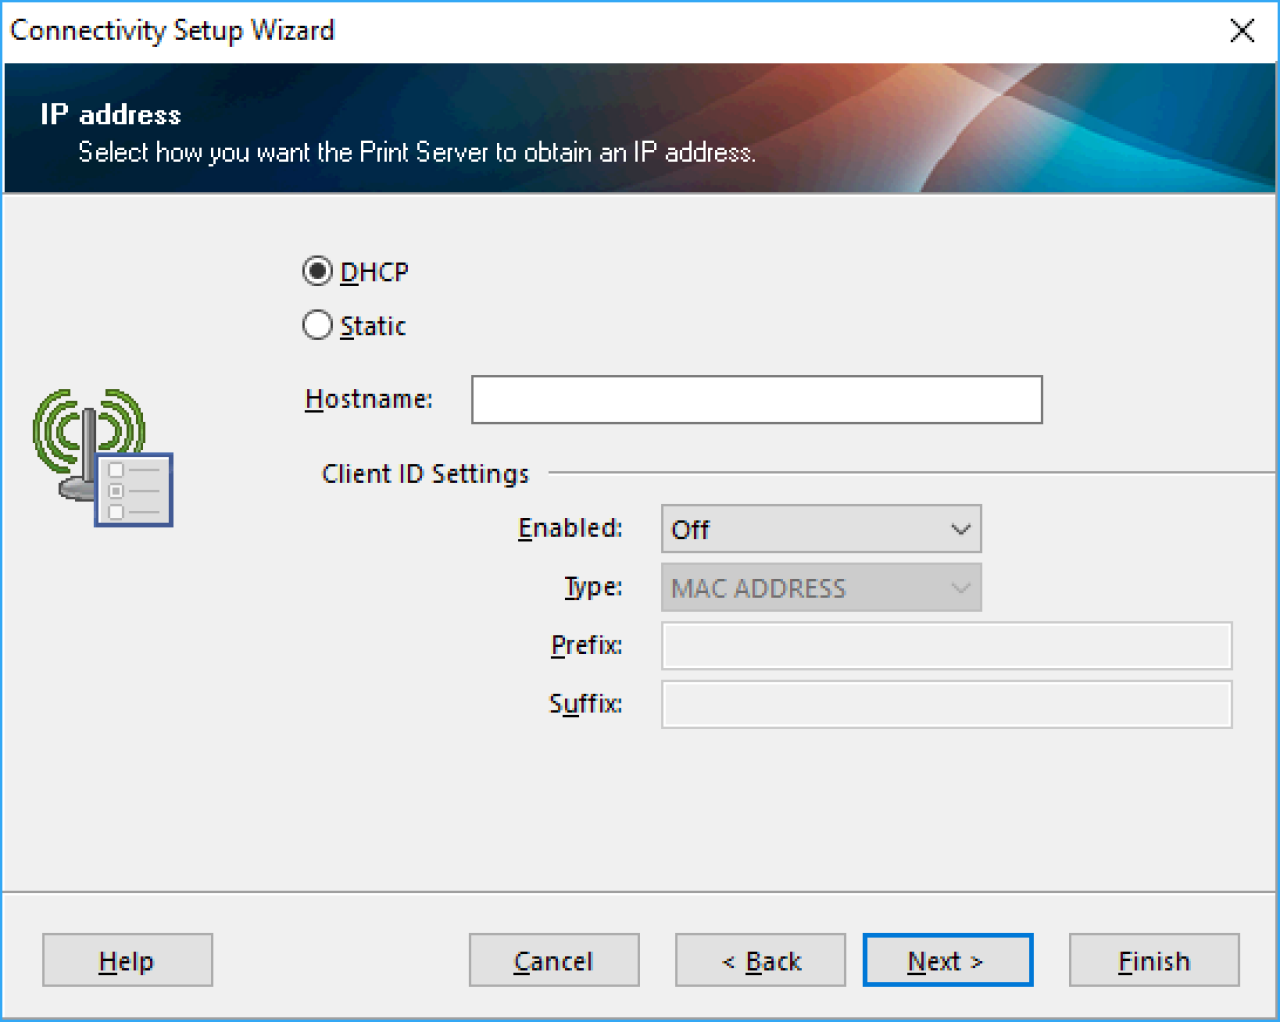
Step 9
Determine if your printer will connect
wirelessly by a dynamic (DHCP) or by
a permanent (Static) IP address:
If your connection is dynamic:
Select DHCP
Click Next
Skip to step 11
If your connection is static:
Select Static
Click Next
Continue with step 10
Step 10
Static setup only
The IP address screen prompts
you for additional information
about your wireless
network:
Enter the IP address you wish
to assign to your printer
Enter the subnet mask and gateway
for your wireless network
Click Next
Step 11
Select the appropriate information
for your wireless network from
the drop-down.
Click Next
Step 12
From the drop-down, select your
country.
Click Next
Step 13
Enter the ESSID
This can sometimes be found as SSID on
a sticker on a wireless router.
From the drop-down:
Select the security mode (if any)
used on your wireless network
Enter additional information
as prompted
Note: if you are unsure of these settings,
you may need to reach out to your IT team.
Accurate information is required for
successful setup.
Click Next
Step 14
If you entered a security mode
in the previous step, you may be
prompted to enter a hex key,
security string or other network information.
Enter information as prompted
Click Next
NOTE: Some settings take Hex or
String values - select the appropriate type
Step 15
If appropriate, complete
information on the Advanced
Settings screen.
Click Next
Step 16
The code generated
by the wizard displays.
Click Next
Step 17
Choose Printer
to send the generated code
directly to the printer.
Click Finish
Note: sending the code to the printer
will reset the printer's network settings.
You may also choose to save the code to a
file that can be sent at a later time.
For additional assistance, please
consult your printer's user guide or
visit Zebra's Support Community