Transform retail operations with Zebra’s retail technology solutions, featuring hardware and software for improving inventory management and empowering teams.
Streamline operations with Zebra’s healthcare technology solutions, featuring hardware and software to improve staff collaboration and optimize workflows.
Enhance processes with Zebra’s manufacturing technology solutions, featuring hardware and software for automation, data analysis, and factory connectivity.
Zebra’s transportation and logistics technology solutions feature hardware and software for enhancing route planning, visibility, and automating processes.
Learn how Zebra's public sector technology solutions empower state and local governments to improve efficiency with asset tracking and data capture devices.
Zebra's hospitality technology solutions equip your hotel and restaurant staff to deliver superior customer and guest service through inventory tracking and more.
Zebra's market-leading solutions and products improve customer satisfaction with a lower cost per interaction by keeping service representatives connected with colleagues, customers, management and the tools they use to satisfy customers across the supply chain.
Empower your field workers with purpose-driven mobile technology solutions to help them capture and share critical data in any environment.
Zebra's range of Banking technology solutions enables banks to minimize costs and to increase revenue throughout their branch network. Learn more.
Zebra's range of mobile computers equip your workforce with the devices they need from handhelds and tablets to wearables and vehicle-mounted computers.
Zebra's desktop, mobile, industrial, and portable printers for barcode labels, receipts, RFID tags and cards give you smarter ways to track and manage assets.
Zebra's 1D and 2D corded and cordless barcode scanners anticipate any scanning challenge in a variety of environments, whether retail, healthcare, T&L or manufacturing.
Zebra's extensive range of RAIN RFID readers, antennas, and printers give you consistent and accurate tracking.
Choose Zebra's reliable barcode, RFID and card supplies carefully selected to ensure high performance, print quality, durability and readability.
Zebra's rugged tablets and 2-in-1 laptops are thin and lightweight, yet rugged to work wherever you do on familiar and easy-to-use Windows or Android OS.
With Zebra's family of fixed industrial scanners and machine vision technologies, you can tailor your solutions to your environment and applications.
Zebra’s line of kiosks can meet any self-service or digital signage need, from checking prices and stock on an in-aisle store kiosk to fully-featured kiosks that can be deployed on the wall, counter, desktop or floor in a retail store, hotel, airport check-in gate, physician’s office, local government office and more.
Discover Zebra’s range of accessories from chargers, communication cables to cases to help you customize your mobile device for optimal efficiency.
Zebra's environmental sensors monitor temperature-sensitive products, offering data insights on environmental conditions across industry applications.
Zebra's location technologies provide real-time tracking for your organization to better manage and optimize your critical assets and create more efficient workflows.
Enhance frontline operations with Zebra’s AI software solutions, which optimize workflows, streamline processes, and simplify tasks for improved business outcomes.
Empower your frontline with Zebra Companion AI, offering instant, tailored insights and support to streamline operations and enhance productivity.
Boost productivity with Zebra Frontline AI Enablers: AI vision models, sample apps, and APIs streamline workflows for efficient business processes.
Zebra Frontline AI Blueprints deliver adaptable, real-world AI frameworks that automate manual tasks and drive efficiency in high-pressure frontline operations.
Zebra Workcloud, enterprise software solutions boost efficiency, cut costs, improve inventory management, simplify communication and optimize resources.
Keep labor costs low, your talent happy and your organization compliant. Create an agile operation that can navigate unexpected schedule changes and customer demand to drive sales, satisfy customers and improve your bottom line.
Drive successful enterprise collaboration with prioritized task notifications and improved communication capabilities for easier team collaboration.
Get full visibility of your inventory and automatically pinpoint leaks across all channels.
Reduce uncertainty when you anticipate market volatility. Predict, plan and stay agile to align inventory with shifting demand.
Drive down costs while driving up employee, security, and network performance with software designed to enhance Zebra's wireless infrastructure and mobile solutions.
Explore Zebra’s printer software to integrate, manage and monitor printers easily, maximizing IT resources and minimizing down time.
Make the most of every stage of your scanning journey from deployment to optimization. Zebra's barcode scanner software lets you keep devices current and adapt them to your business needs for a stronger ROI across the full lifecycle.
RFID development, demonstration and production software and utilities help you build and manage your RFID deployments more efficiently.
RFID development, demonstration and production software and utilities help you build and manage your RFID deployments more efficiently.
Zebra DNA is the industry’s broadest suite of enterprise software that delivers an ideal experience for all during the entire lifetime of every Zebra device.
Advance your digital transformation and execute your strategic plans with the help of the right location and tracking technology.
The Zebra Aurora suite of machine vision software enables users to solve their track-and-trace, vision inspection and industrial automation needs.
Zebra Aurora Focus brings a new level of simplicity to controlling enterprise-wide manufacturing and logistics automation solutions. With this powerful interface, it’s easy to set up, deploy and run Zebra’s Fixed Industrial Scanners and Machine Vision Smart Cameras, eliminating the need for different tools and reducing training and deployment time.
Aurora Imaging Library™, formerly Matrox Imaging Library, machine-vision software development kit (SDK) has a deep collection of tools for image capture, processing, analysis, annotation, display, and archiving. Code-level customization starts here.
Aurora Design Assistant™, formerly Matrox Design Assistant, integrated development environment (IDE) is a flowchart-based platform for building machine vision applications, with templates to speed up development and bring solutions online quicker.
Designed for experienced programmers proficient in vision applications, Aurora Vision Library provides the same sophisticated functionality as our Aurora Vision Studio software but presented in programming language.
Aurora Vision Studio, an image processing software for machine & computer vision engineers, allows quick creation, integration & monitoring of powerful OEM vision applications.
Adding innovative tech is critical to your success, but it can be complex and disruptive. Professional Services help you accelerate adoption, and maximize productivity without affecting your workflows, business processes and finances.
Zebra's Managed Service delivers worry-free device management to ensure ultimate uptime for your Zebra Mobile Computers and Printers via dedicated experts.
Find ways you can contact Zebra Technologies’ Support, including Email and Chat, ask a technical question or initiate a Repair Request.
Zebra's Circular Economy Program helps you manage today’s challenges and plan for tomorrow with smart solutions that are good for your budget and the environment.
The Zebra Knowledge Center provides learning expertise that can be tailored to meet the specific needs of your environment.
Zebra has a wide variety of courses to train you and your staff, ranging from scheduled sessions to remote offerings as well as custom tailored to your specific needs.
Build your reputation with Zebra's certification offerings. Zebra offers a variety of options that can help you progress your career path forward.
Build your reputation with Zebra's certification offerings. Zebra offers a variety of options that can help you progress your career path forward.
Powertrain Assembly Verification
Powertrain assembly demands precise verification at production speed. Teams must confirm the correct presence and installation of piston rings, camshafts, lifters, and spark plugs, plus wiring integrity, hose-and-clamp completion, and proper cable routing. Fixed industrial scanning, optical character recognition (OCR), and 2D imaging validate part identity and placement in-line. Purpose-built inspections detect assembly errors instantly, reducing rework and protecting quality.
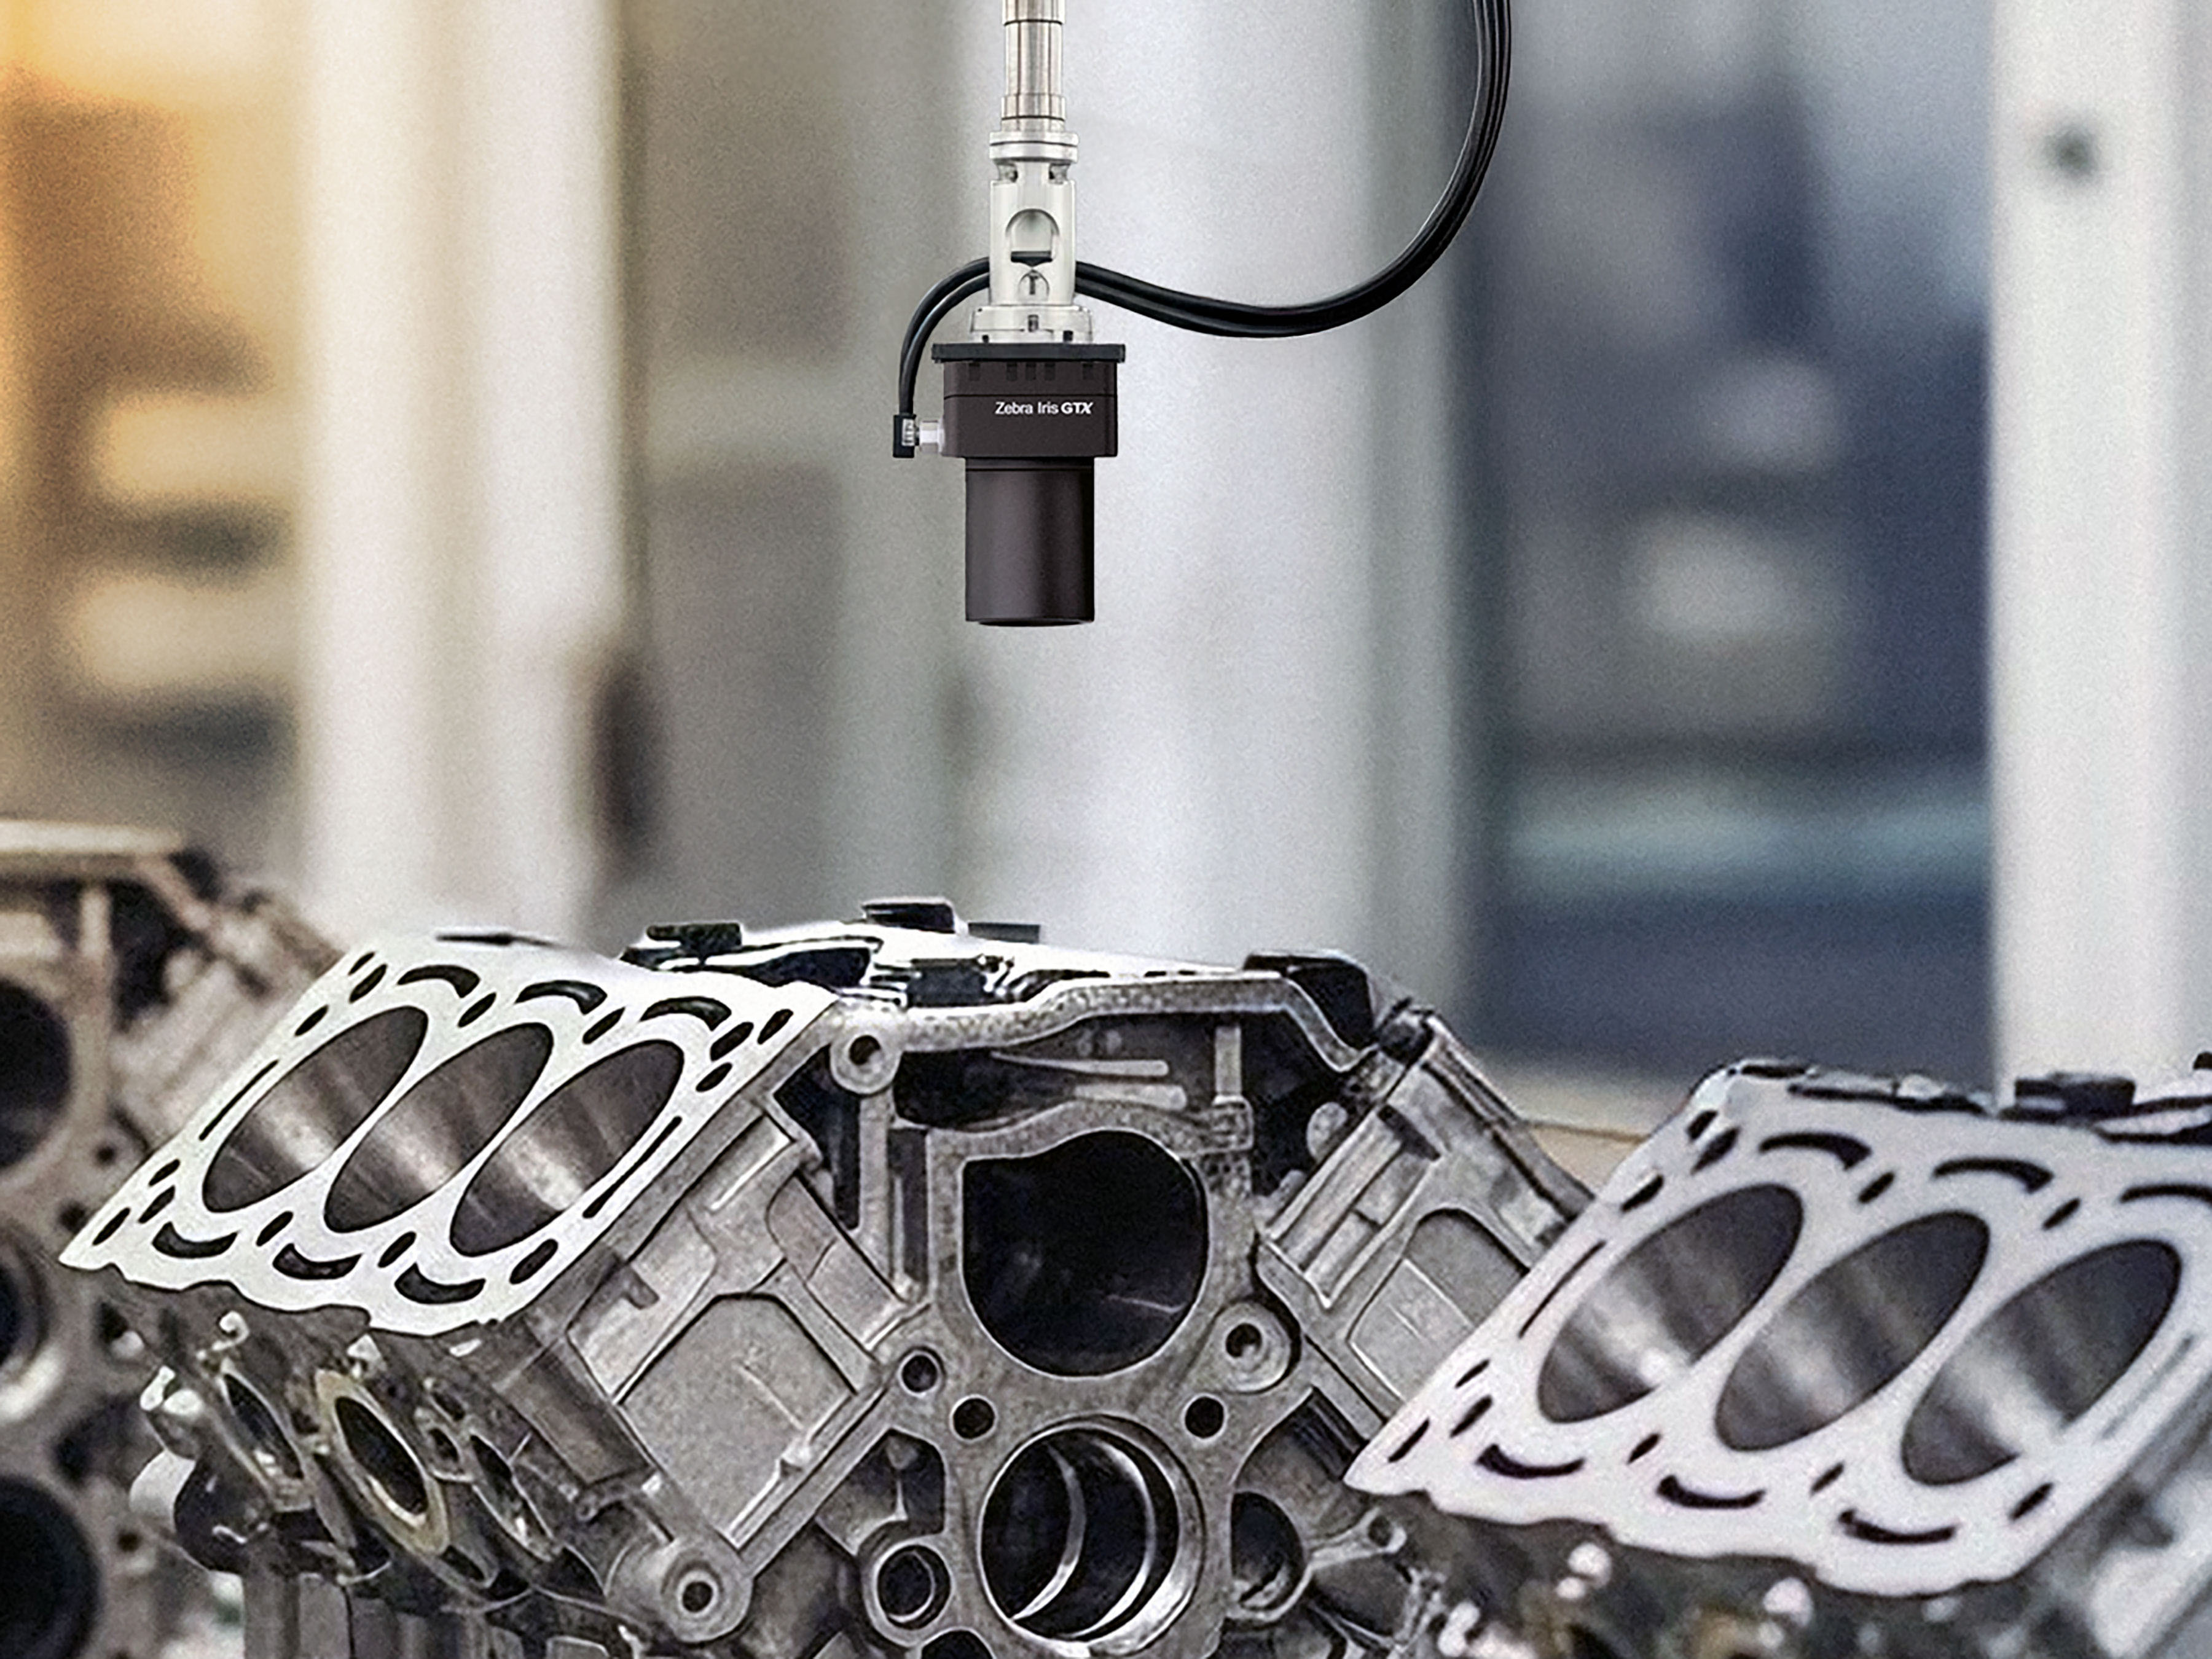
Unify code reading, OCR, and 2D inspections to verify every engine component, prevent build errors, and strengthen end-to-end traceability

Verify components and codes in-line
Zebra fixed industrial scanners read direct part marked (DPM) 1D/2D codes or identifiers on each component used in the assembly in real time. Scanned codes and unique part identifiers are used to confirm correct component selection before torque or test and create a master record for traceability and compliance purposes. At line speed, scanners verify piston rings, camshafts, lifters, spark plugs, and kit contents, and trigger exceptions or mismatches, so operators can intervene early. Robust decoding algorithms handle low-contrast, oily, or curved surfaces common in powertrain manufacturing.
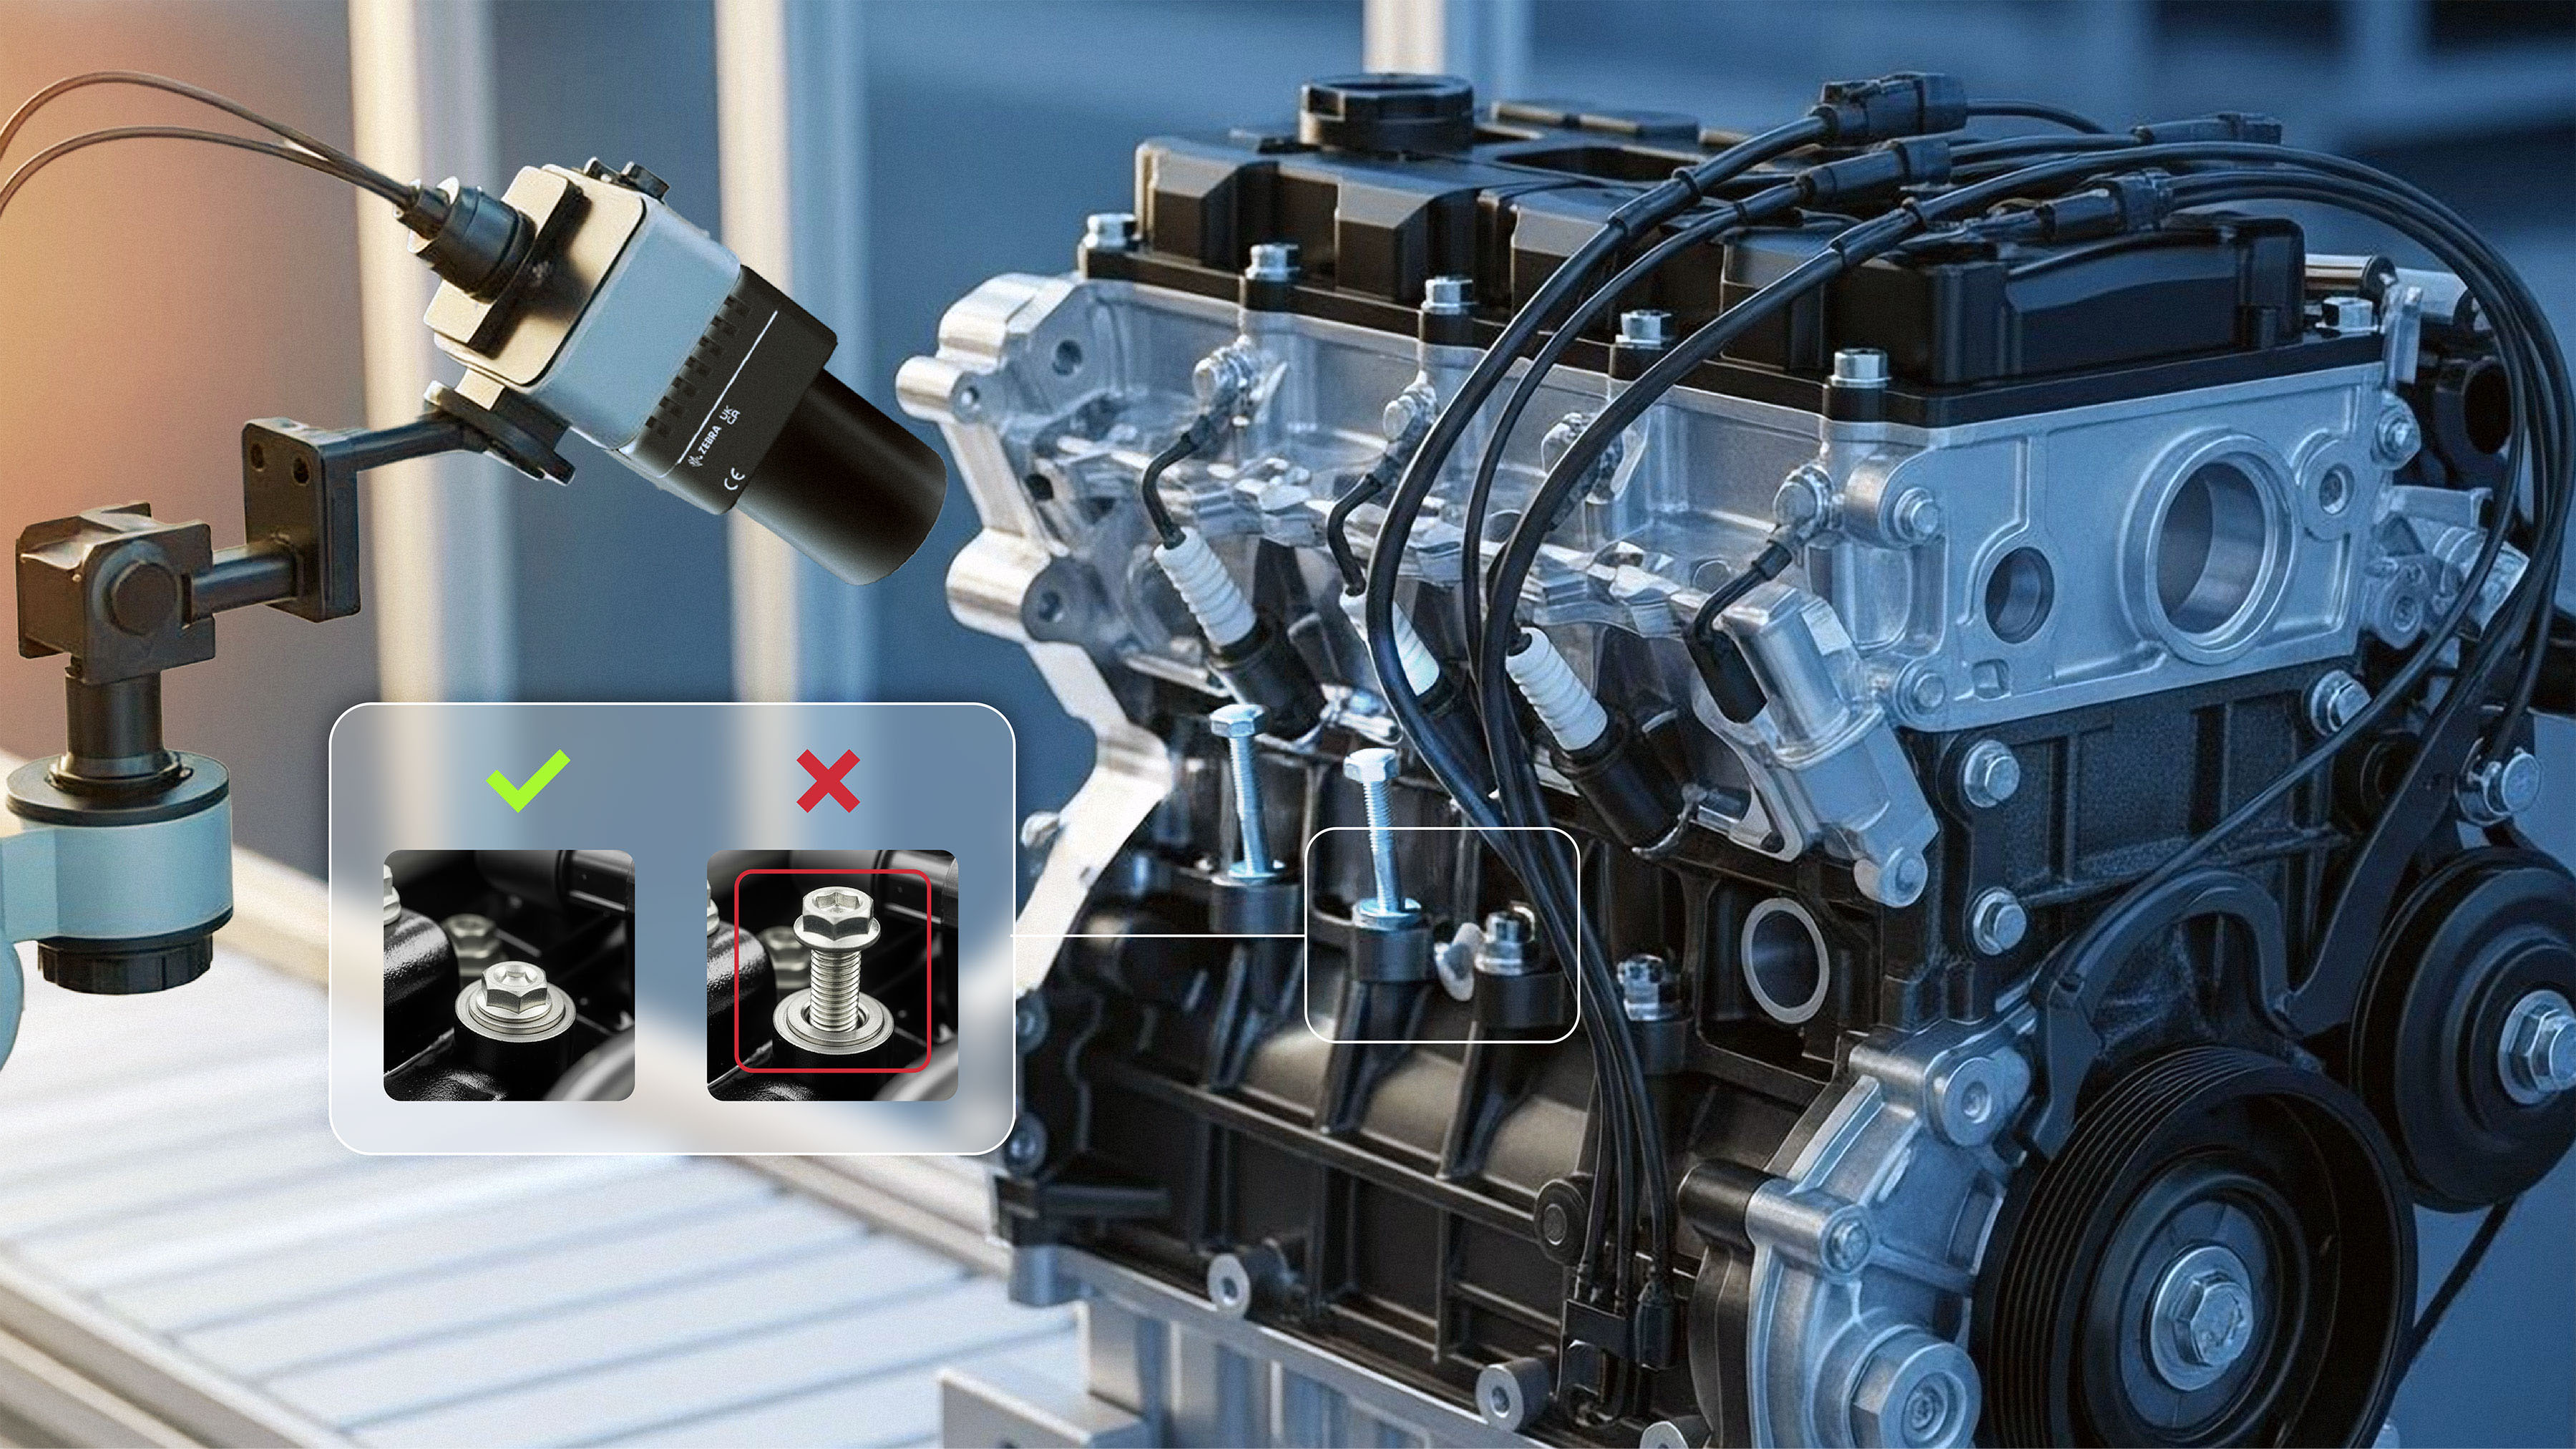
Connect inspection to traceability
Zebra smart cameras, such as the Iris GTX, run 2D inspections to automatically confirm presence, orientation, and placement. They verify hose-and-clamp completion and check wiring integrity and proper cable routing. Pass/fail decisions can drive automatic material handling. Good parts advance while exceptions stop or bypass the station to prevent downstream rework. Zebra smart cameras can then report results to the Manufacturing Execution System (MES), tying each scan and image to the engine serial number. This supports immediate diagnostics and end-to-end traceability.

Add Aurora Design Assistant for complex checks
Aurora Design Assistant is a flowchart-based machine vision development environment designed for building applications without traditional coding, enabling the creation of web-based operator HMIs and offering hardware-agnostic deployment on PCs, smart cameras, or vision controllers, making it ideal for multi-camera powertrain inspections. It features integrated deep learning tools for classification, segmentation, object detection, and no-code OCR, allowing it to handle tasks such as distinguishing look-alike components, verifying cable routing, and checking component seating under variable conditions.
Related Use Cases
Fixed Industrial Scanning and Machine Vision Success Stories
Talk to a Partner
Need more information on what solution is right for your needs? A partner can help.
Talk to Sales
Connect with our pre-sales team to get more information about our products, solutions and how to purchase.
Legal Terms of Use Privacy Policy Supply Chain Transparency
ZEBRA and the stylized Zebra head are trademarks of Zebra Technologies Corp., registered in many jurisdictions worldwide. All other trademarks are the property of their respective owners. Note: Some content or images on zebra.com may have been generated in whole or in part by AI. ©2026 Zebra Technologies Corp. and/or its affiliates.


